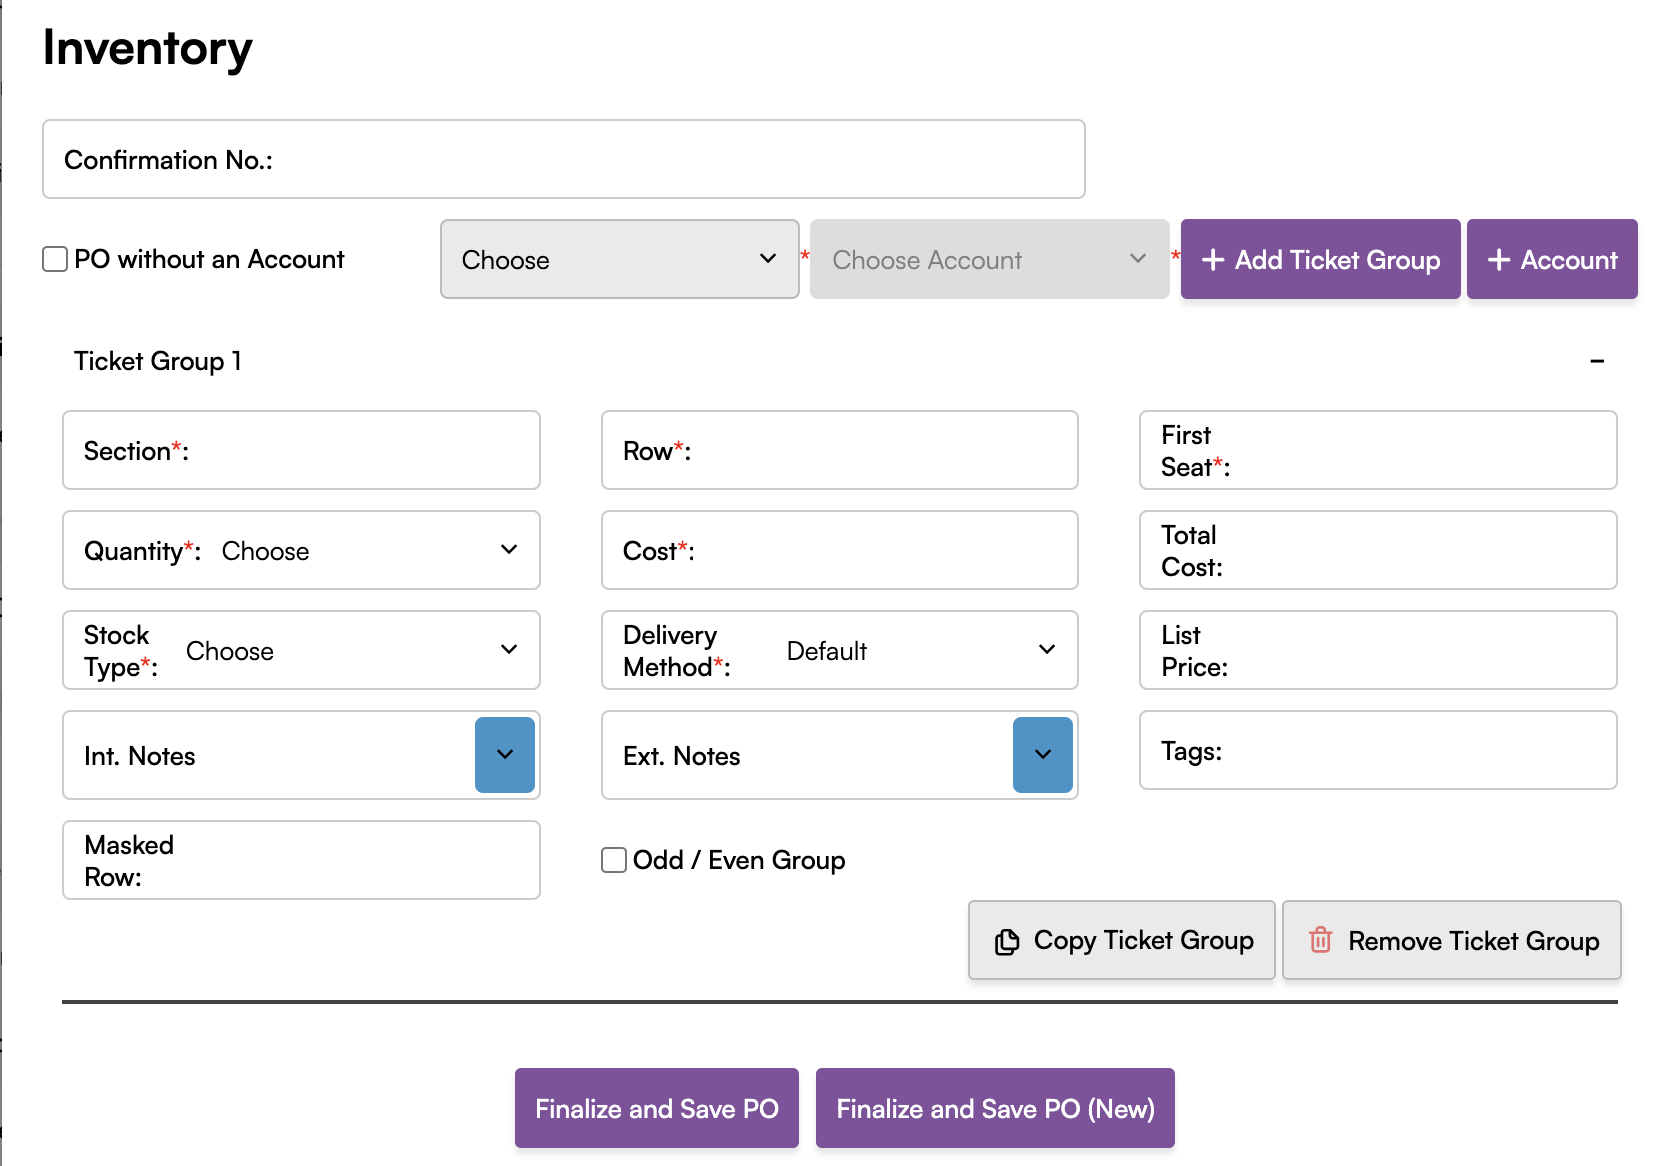
You can manually create a Purchase Order directly in Terminal from the Create PO page.
-
From the Create PO page, enter event details and click Search.
-
Select all Events you want to create POs for and click Add Inventory.
-
Complete all required fields marked with an asterisk.
-
Once you have completed all fields, confirm that the information is correct and select Finalize and Save PO to create the PO.

There are a number of fields you can use during the manual PO process to set up your inventory as needed. Below are just a few:
- Delivery Method: Choose between URL or Default delivery methods.
- Confirmation Number: If you have the Confirmation Number from the original purchase, add it here for easier tracking.
- PO without an Account: In case you want to take responsibility for delivery, simply exclude account information.
- Masked Row: In case you want to mask your row in broadcasting, add the Masked Value here. To confirm it has been applied look in the tags column on your listing.
PRO TIP
Only mask by one or two rows for best practice and best customer experience. Always ensure that you are masking your existing listing with a less desirable seat.
When adding account information, you may need to create a new account on the fly. You can do this easily by using the + Account button.
-
If you need to add a new account, select + Account.
-
Within the new account window, select an Account Type and add your Account login and Password. Click Add.